Designing Menus
Documentation | Blog | Demos | Support
Designing Menus
0 out of 5 stars
| 5 Stars | 0% | |
| 4 Stars | 0% | |
| 3 Stars | 0% | |
| 2 Stars | 0% | |
| 1 Stars | 0% |
✓ From the Database tab, open an existing menu by double clicking on the menu name or
From the main menu (File -> New, or the “New” icon in the menu toolbar), create a new menu object or
Open a form/display with an associated menu.
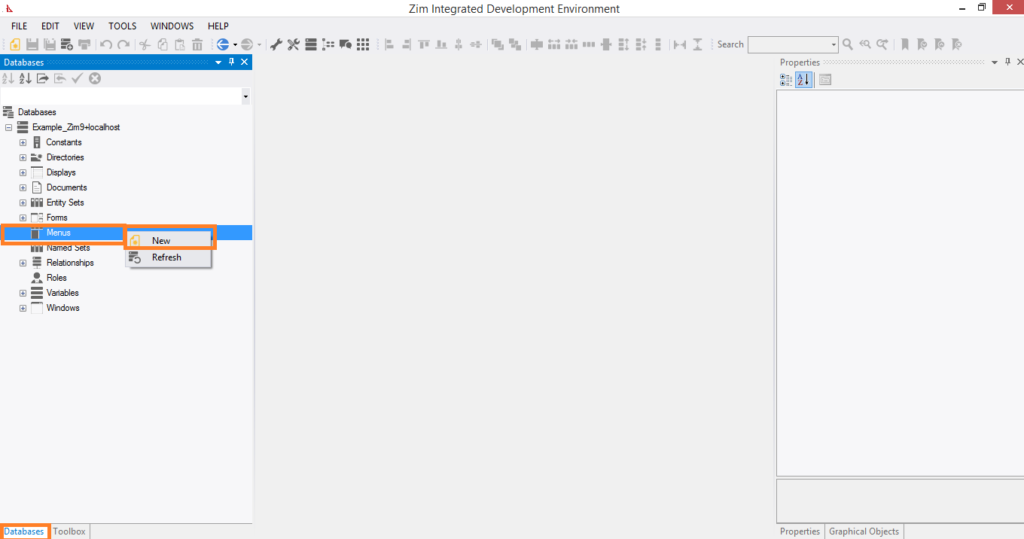
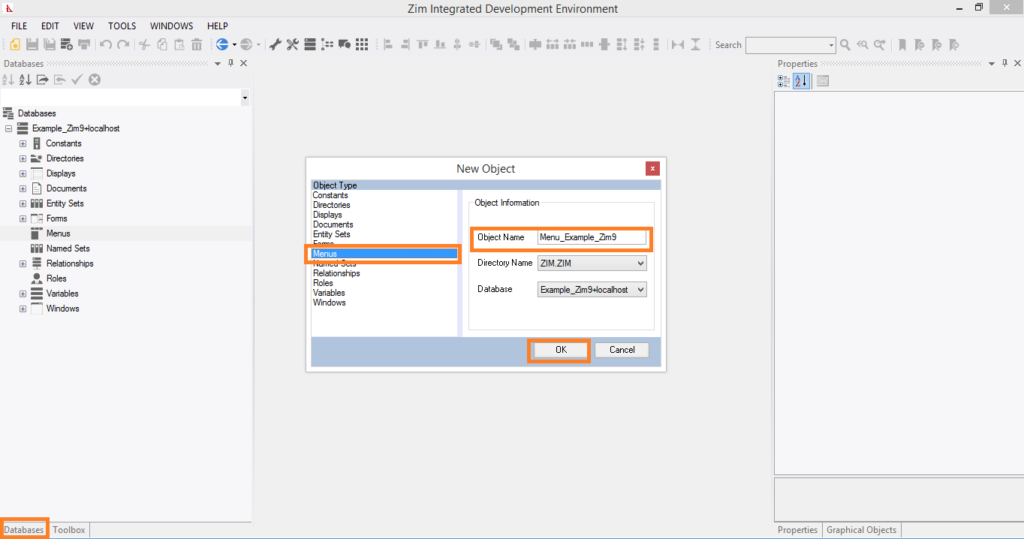
✓ Add a menu item.
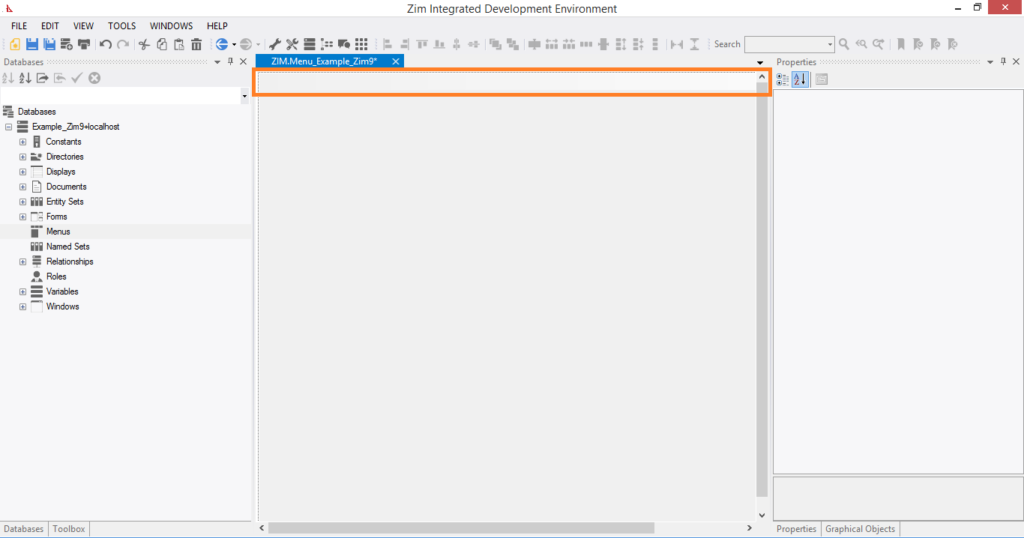
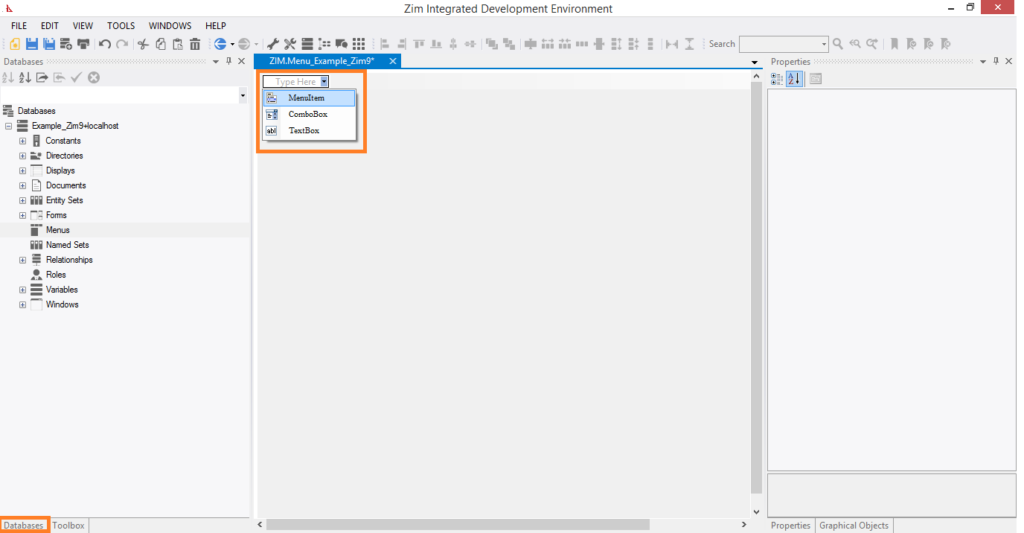
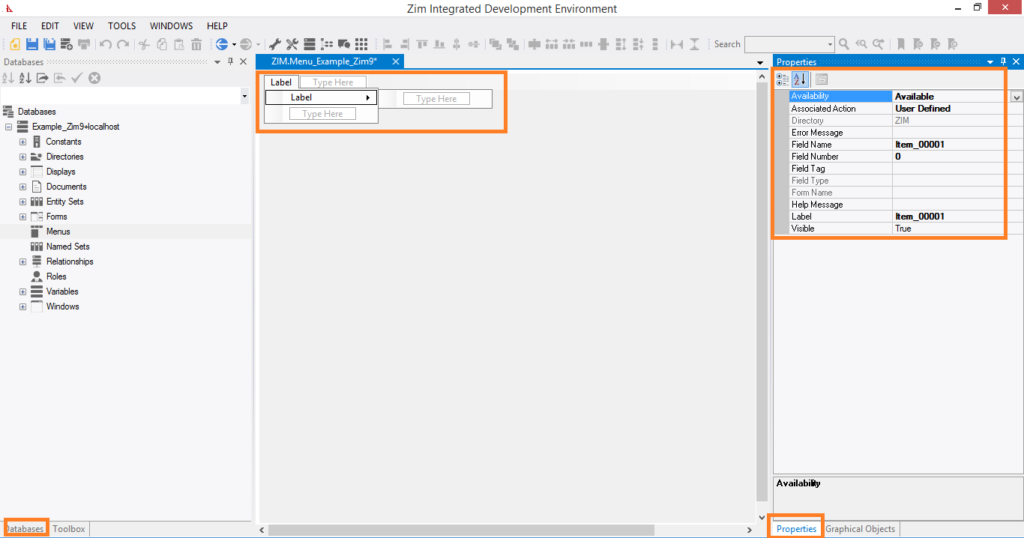
Click on the menu bar where it says “Type Here” and a new menu item will be added immediately at that location.
Note: As long as you see a menu item that still says “Type Here”, that menu item has not yet been added to your menu and will not be saved. The IDE is showing the available locations where a menu item can currently be added.
✓ Edit menu item properties.
On the right hand side of the painter window, select the properties tab to view/change the available properties for the currently selected menu item, and to see the children of that menu item listed at the bottom of that tab.
To change the location of an item within the menu, drag and drop the menu item to the desired position.
0 out of 5 stars
| 5 Stars | 0% | |
| 4 Stars | 0% | |
| 3 Stars | 0% | |
| 2 Stars | 0% | |
| 1 Stars | 0% |