Zim Object Naming Rules


Valid Zim object names can be 1 to 18 characters in length. Valid characters for inclusion in an object name include the dollar sign ($), the underscore character (_), the letters a through z and A through Z, and the digits 0 through 9. The first character of an object name must be either a letter or a dollar sign.

Forms

Main Characteristics of Form Objects

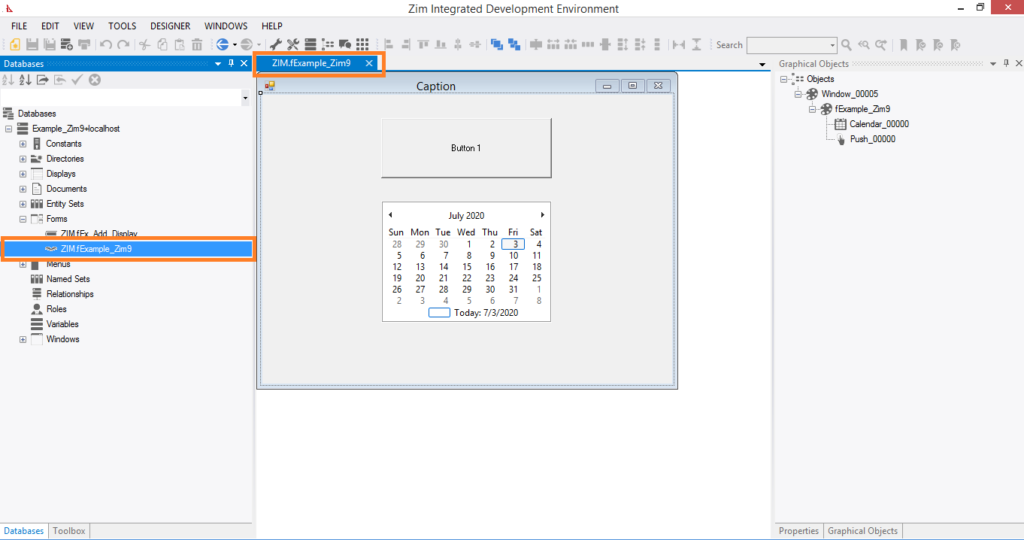
✓ A form acts as a container for the form fields objects it owns

✓ Form objects do not have any visual attributes other than implicit dimensions

✓  The visual appearance of a form is the result of the visual attributes of the form fields owned by each of the forms  owned by the display

✓ The dimensions of a form are considered to be the internal dimensions (i.e. the client area) of the window

✓ The Property Tab is not available for display objects

✓ The Zim language includes an extensive suite of commands for dynamically modifying both the visual and behavioral characteristics the form fields owned by forms

✓ The UI Designer supports the creation of associations among windows, menus and displays so that they can be       viewed and/or edited as a group.

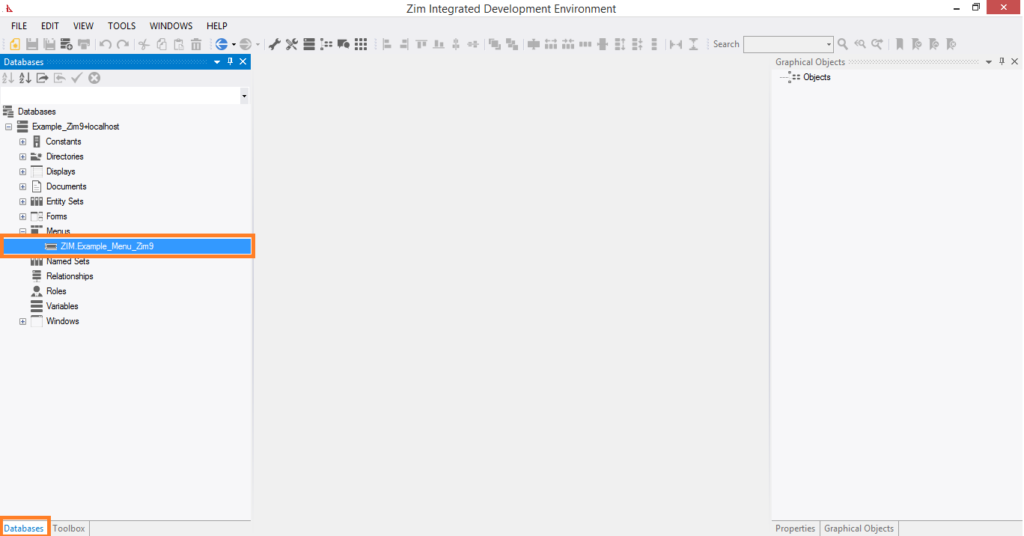
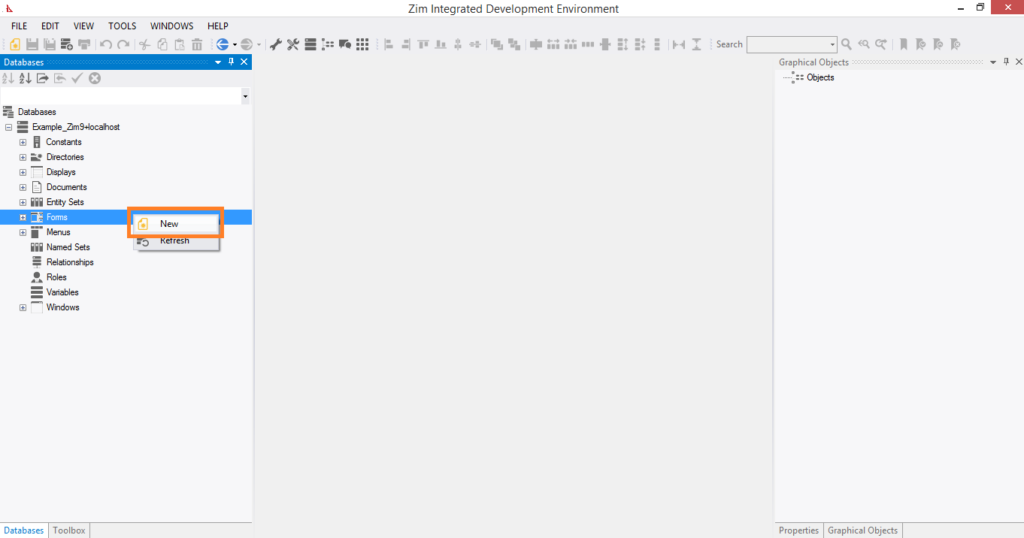
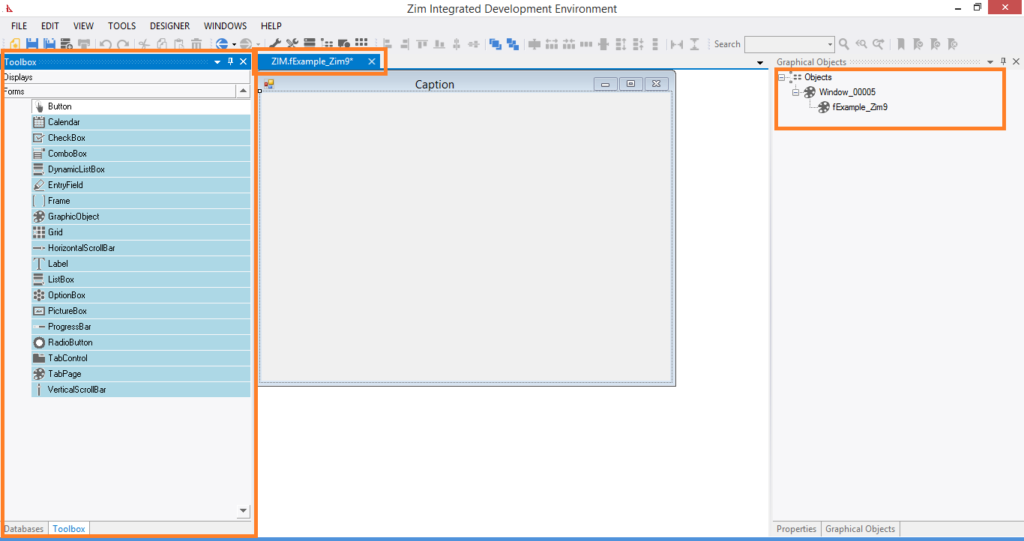
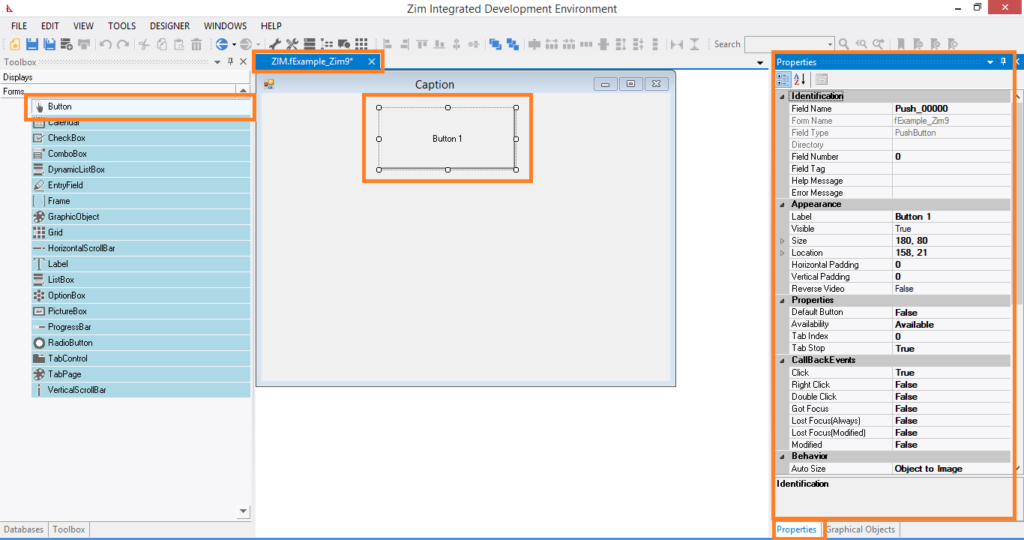
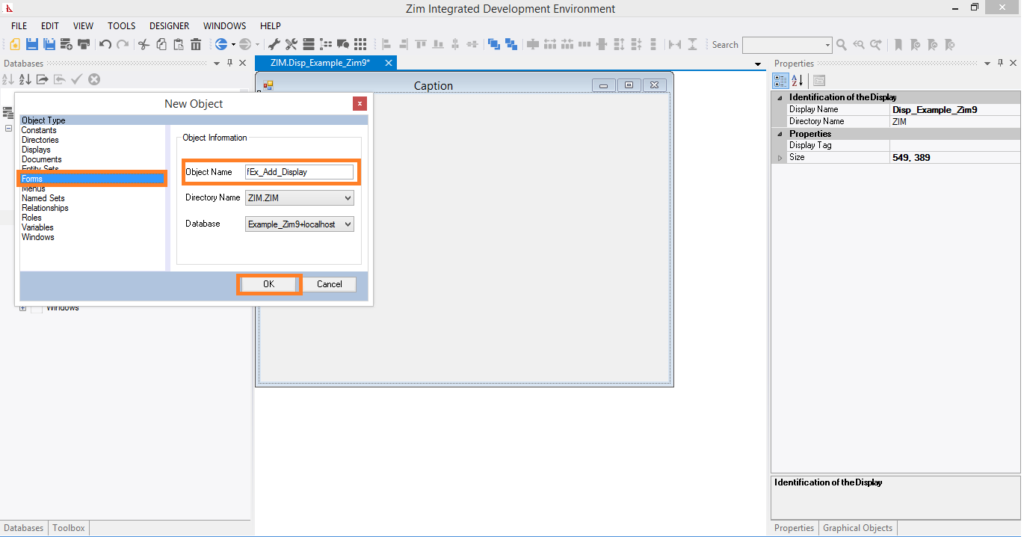
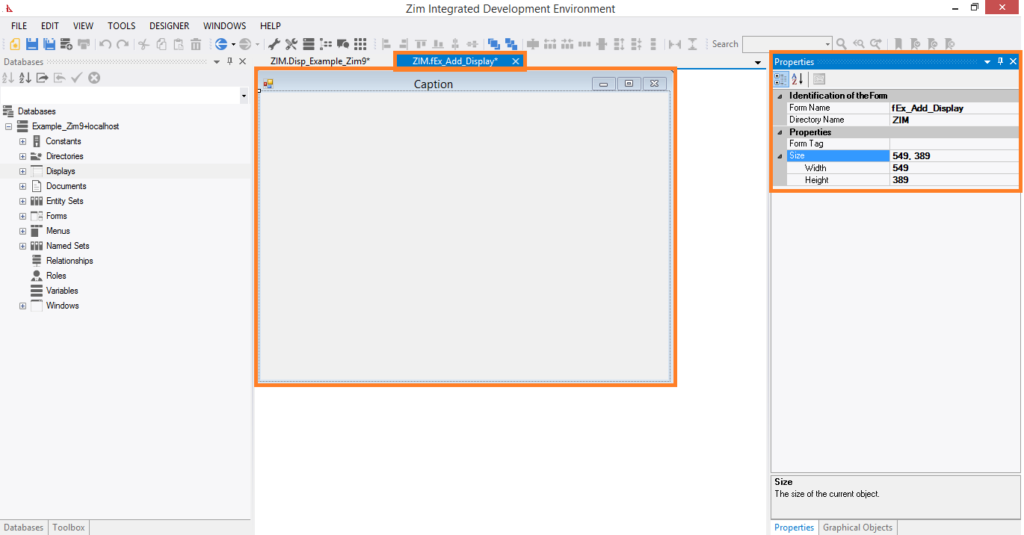
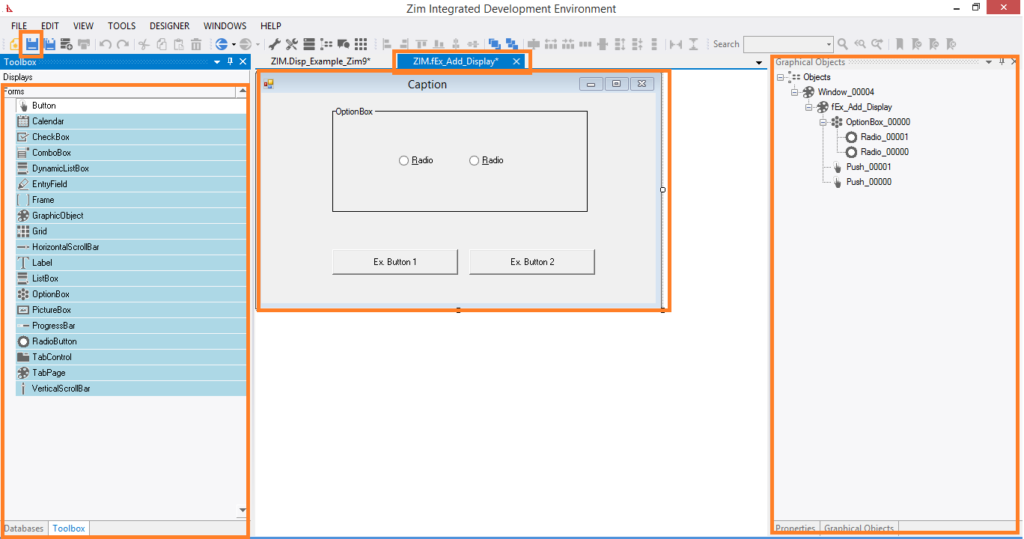
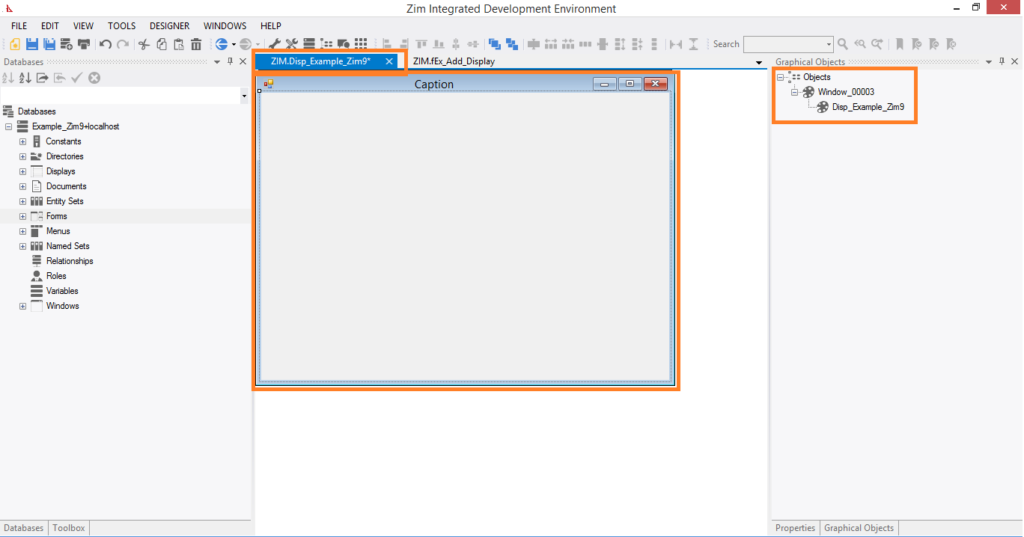
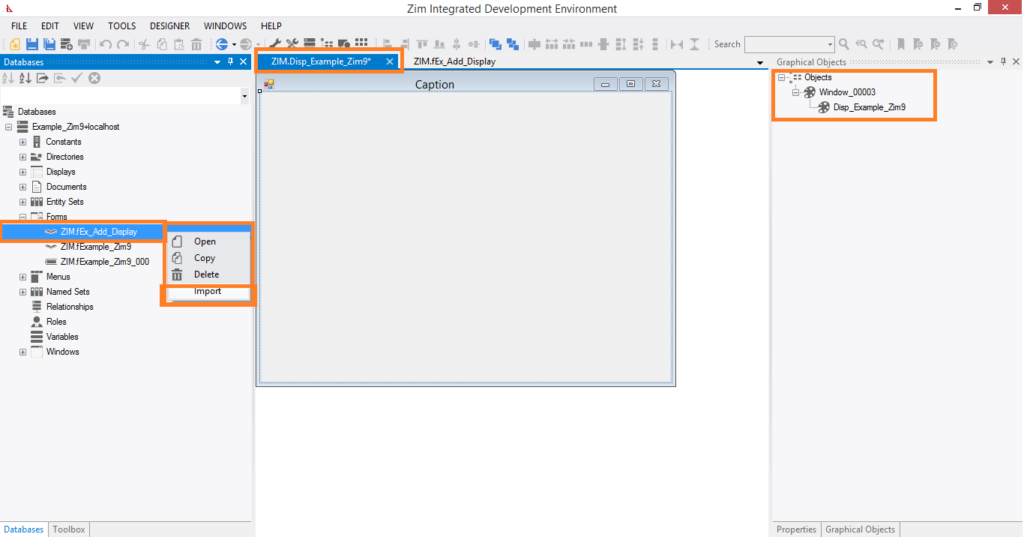
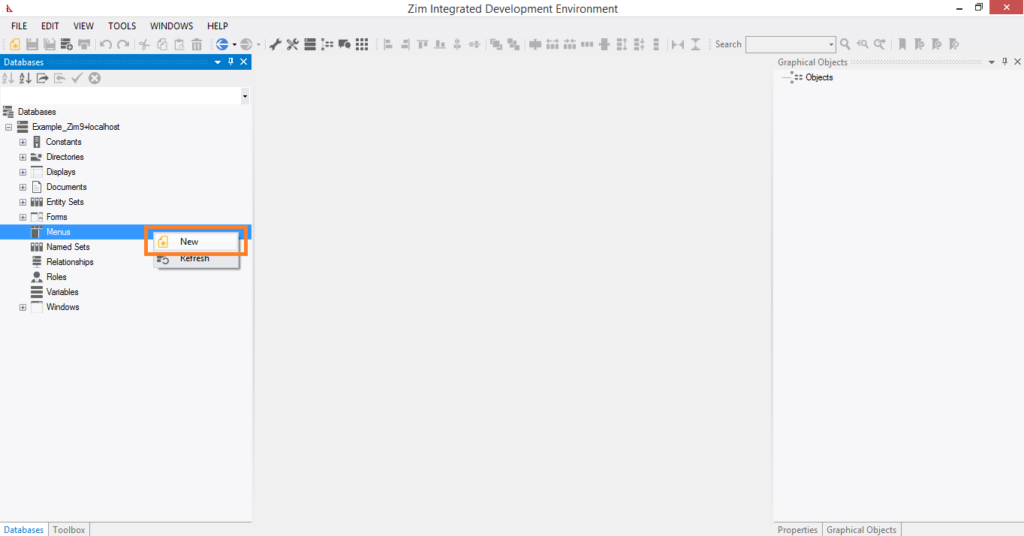
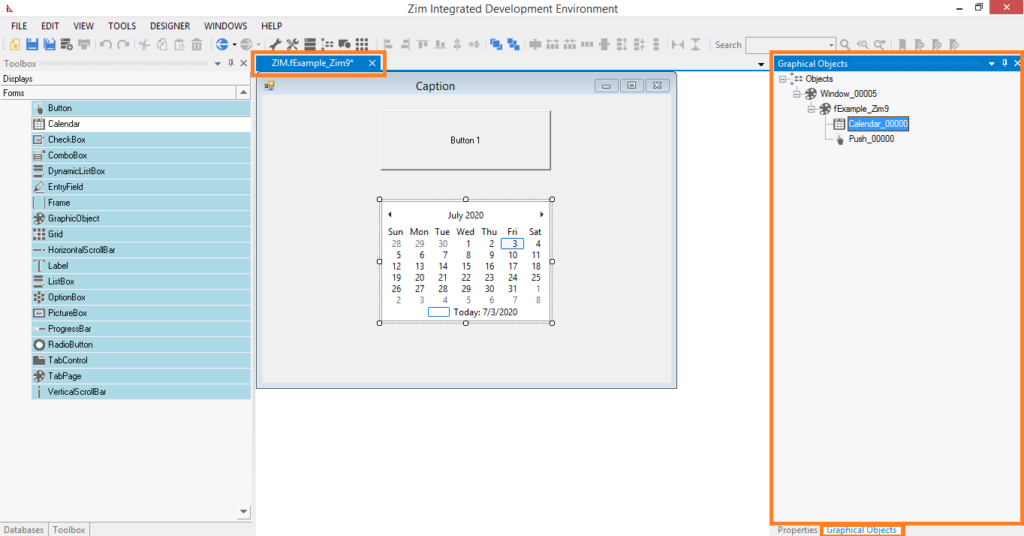
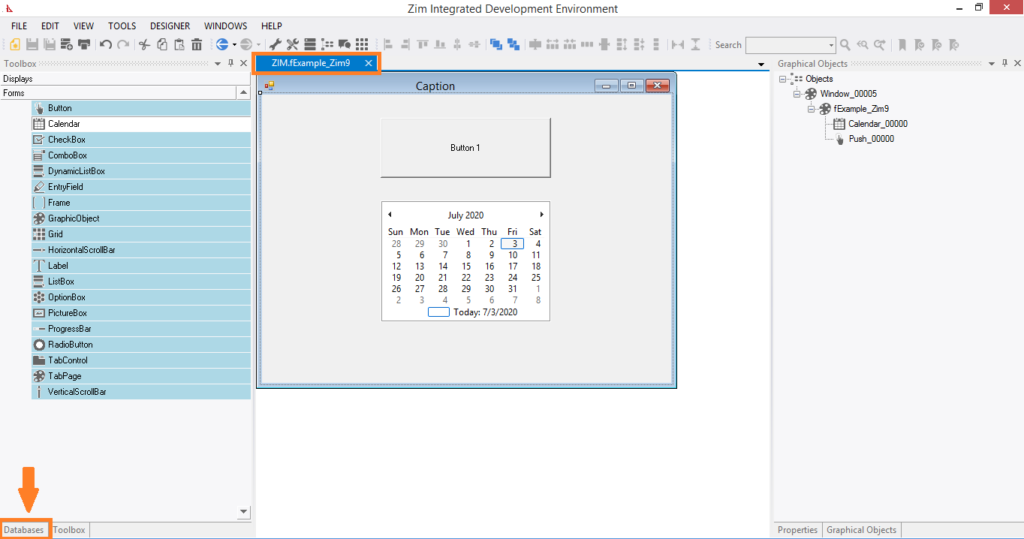
Creation of Forms step by step:


The Menu Item

Main Characteristics of Menu Item Objects


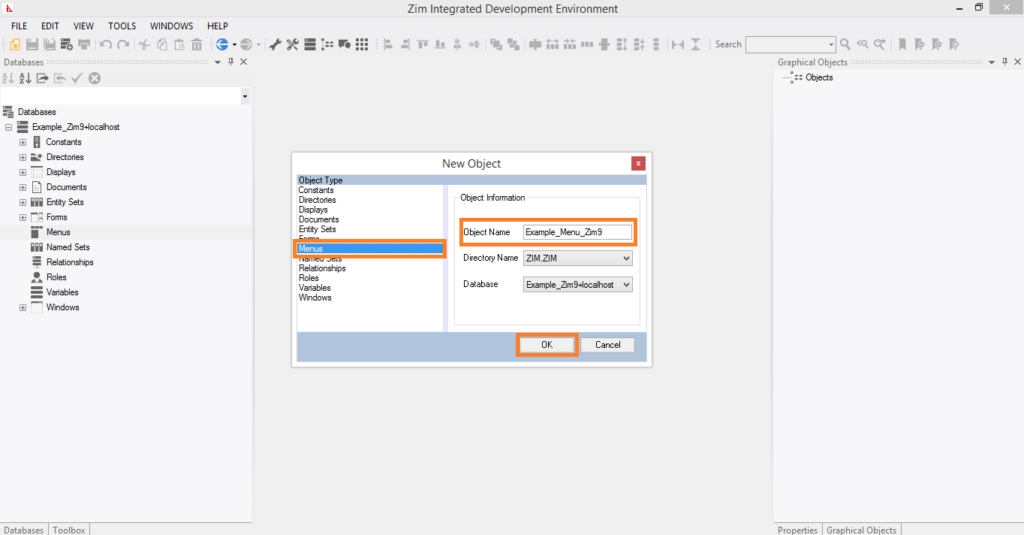
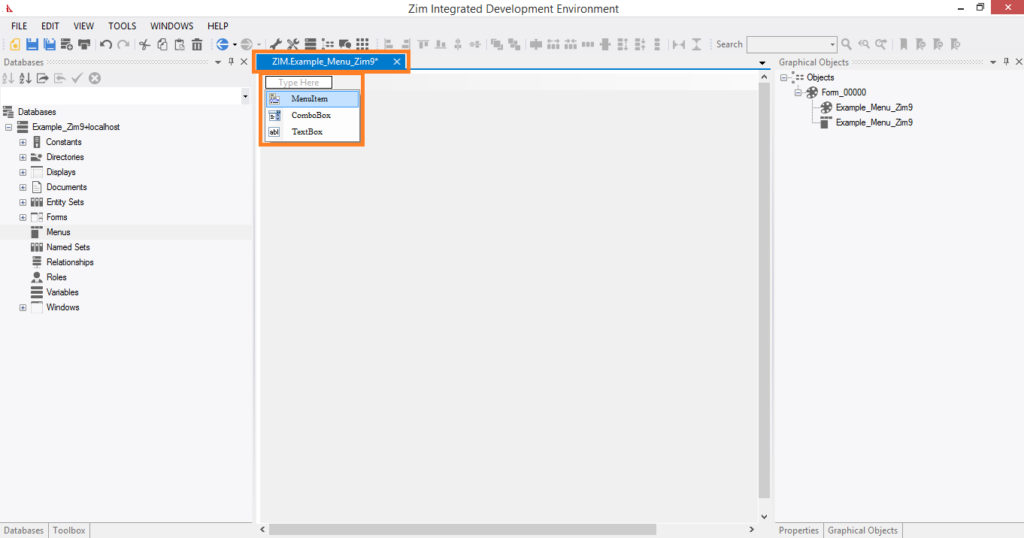
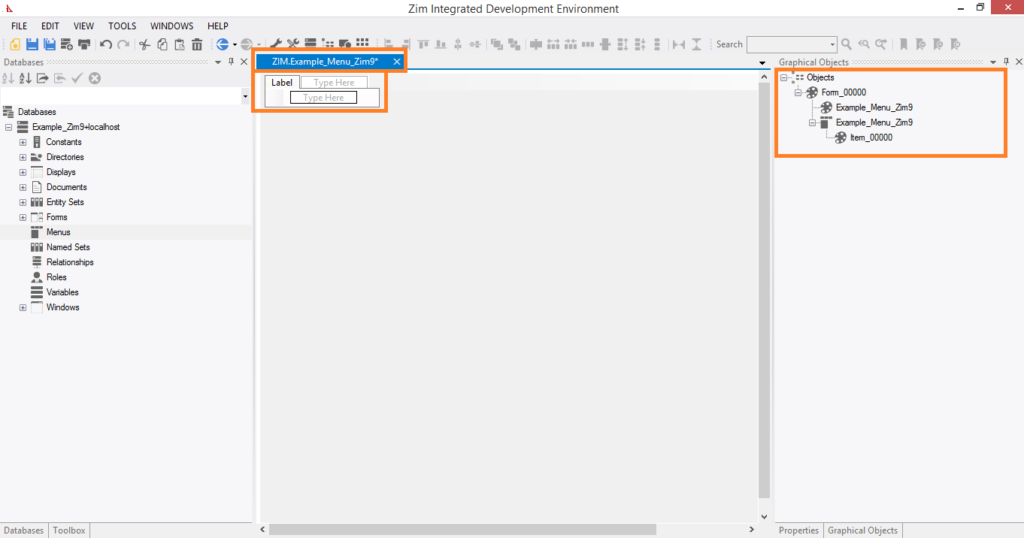
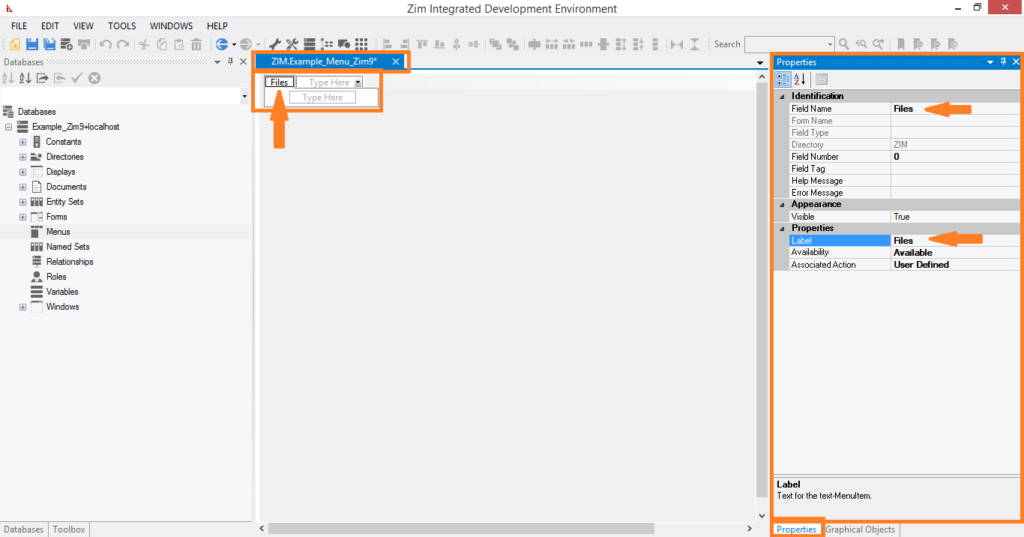
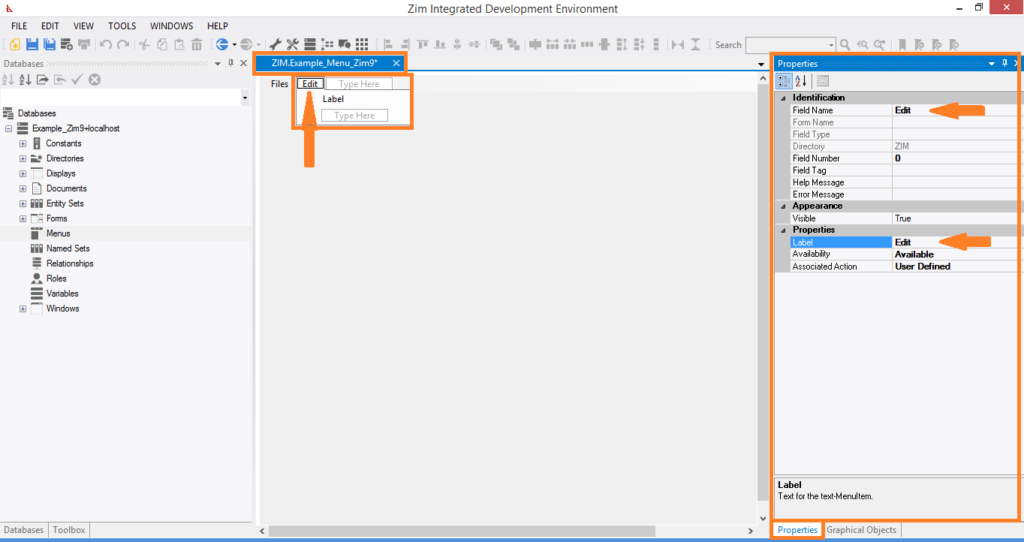
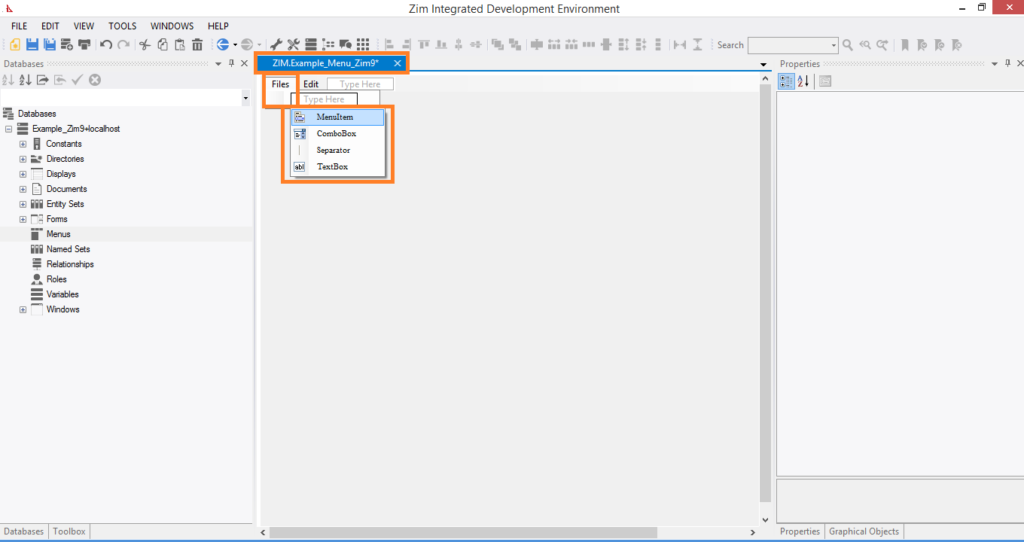
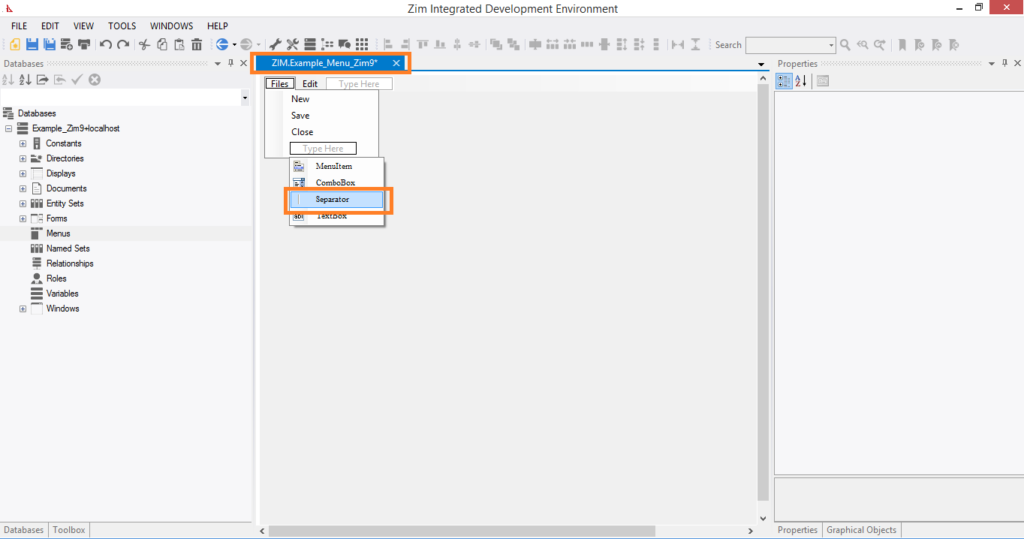
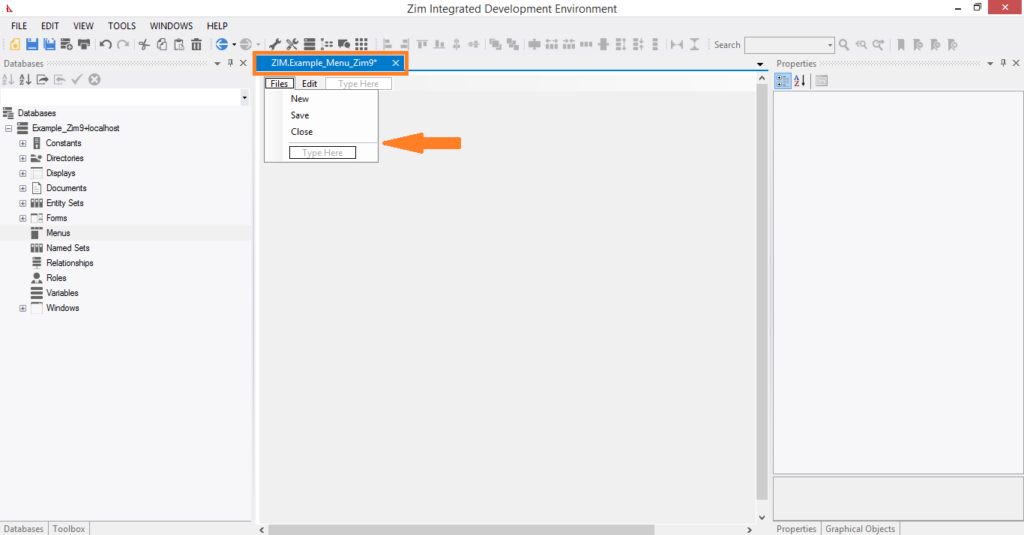
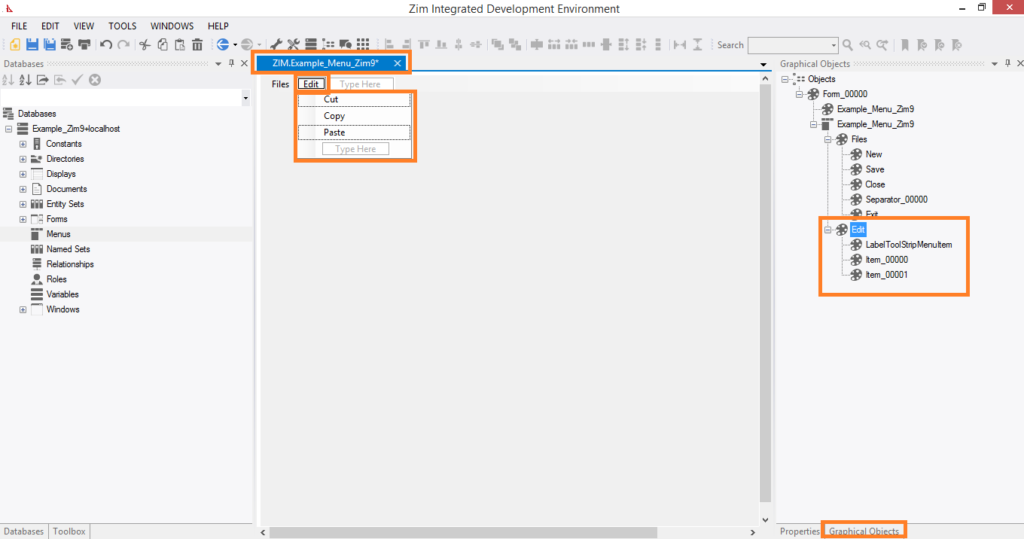
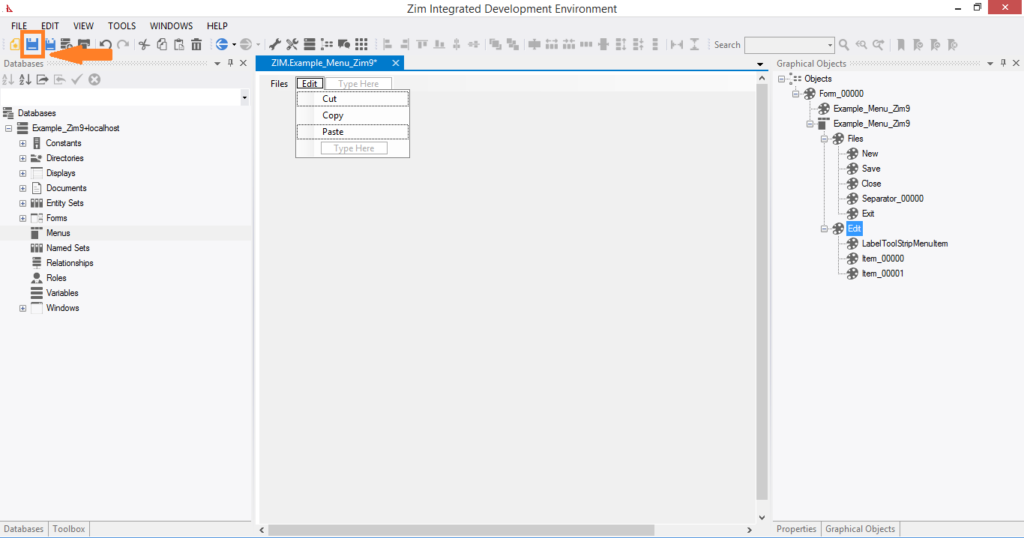
Menu item objects deliver both the visual and behavioral characteristics of menu objects. Menu items can be owned directly by the menu. In this case they appear on the menu “bar”. A menu item owned by the menu can itself own other menu items. This enables menu lists to be constructed. Even menu items in a list can own other menu items. This enables “cascading” menu structures to be constructed. Menus thus provide a flexible mechanism for enabling the application end-user to control the execution flow through an application. Although the selection of a particular menu item is generally interpreted by the application program, many predefined system actions can also be associated with menu items. Menu items can also be defined to exhibit the “On/Off” binary state condition. To inspect the attributes supported by the painter for menu item objects, display the Edit Menu Item dialog by double clicking on the menu item. The Zim language includes a suite of commands for dynamically modifying both the visual and behavioral characteristics of menu item objects.


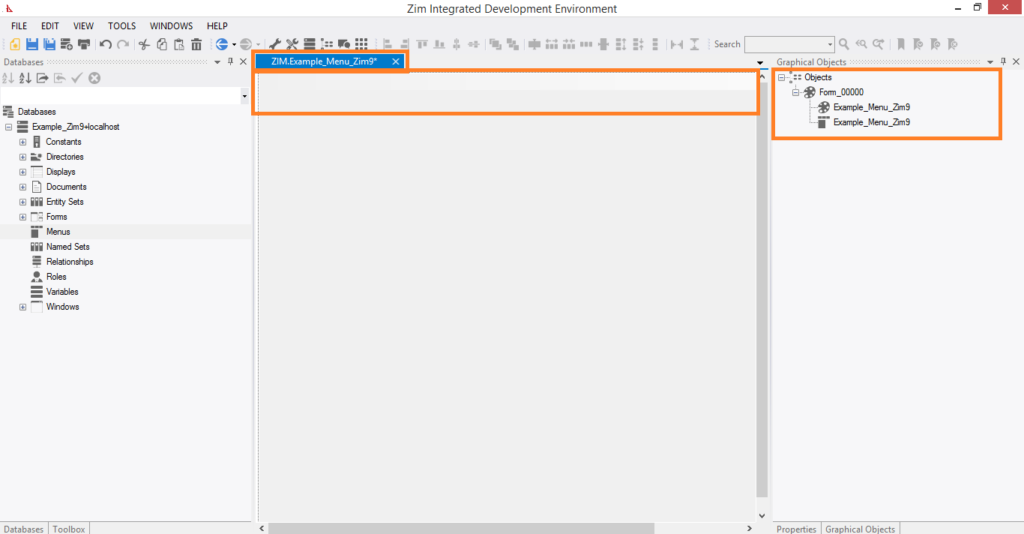
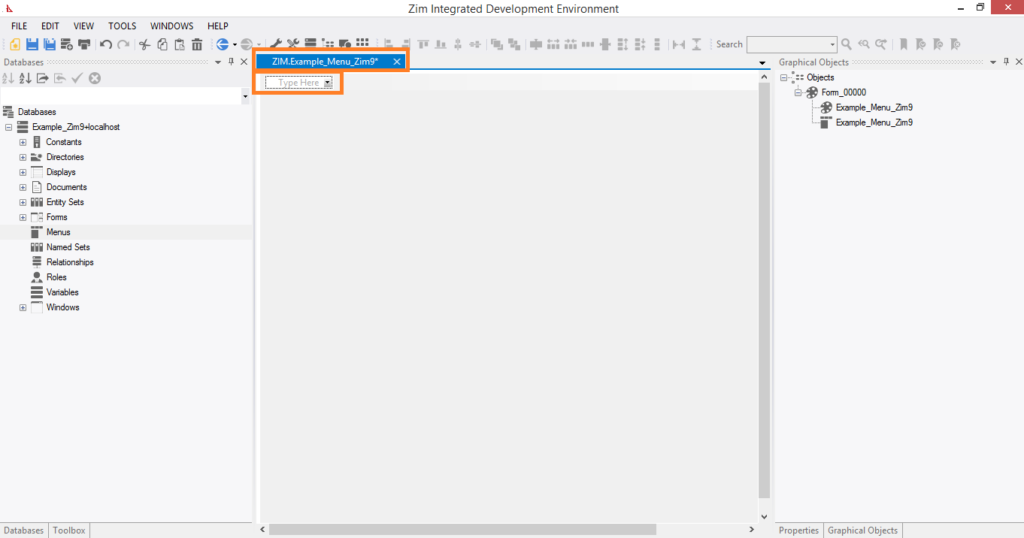
Creation of Menu Item step by step:

Menus


Main Characteristics of Menu Objects


 ✓ The visual attribute of a menu object is the menu bar located at the top of the client area of a window

✓ Menu objects are owners of menu item objects

✓ The Zim language includes an extensive suite of commands for dynamically modifying both the visual and the behavioral characteristics of the menu items owned by menus

✓ The UI Designer supports the creation of associations between windows, menus and either forms or displays so that they can be viewed and/or edited as a group


Adding Menu Objects


A menu object can be added only to the Designer workspace when the UI Designer has been invoked by either FORM DEFINE or DISPLAY DEFINE;

Note that only windows that are resizable, have a caption bar, and are not clipped to their parent window can accept menus;

If you have modified the window’s attributes such that any one of these conditions is not true, then an error dialog to that effect is displayed when you attempt to add the menu;

You need to edit the window’s attributes (double click in an empty area within the window), such that these conditions are true before a menu can be accepted.

A menu object is added by clicking on the icon in the object gallery that represents the menu object type.

It is generally the icon second from the end at the right of the gallery. At some screen resolutions, you have to scroll the gallery using the large scroll arrows located at either end for the menu object to come into view.

When the cursor takes the form of an outline image of the menu icon, click anywhere within the window.

The menu bar appears at the top of the window and the Add Menu dialog is displayed.

Note that a menu has only attributes which relate to identification.

Its visual attributes are fixed, as it always appears as a horizontal menu bar at the top of a window. You can also change any menu attribute at a later time by displaying the Edit Menu dialog.

There are other ways to add menus. You can import a menu whose definition exists in the Data Dictionary. You can also paste a menu which has been either cut or copied from another painter session.

The Add Menu Dialog

Menu objects can be added only when the painter has been invoked by either the FORM DEFINE or the DISPLAY DEFINE command, or a form or display object has been selected for editing from within the Zim IDE Development. The Add Menu dialog is presented when a menu object is selected from the Object Gallery and placed within the window in the Presentation Area. Except for the caption, this dialog is identical to the Edit Menu dialog. Refer to the Add Menu dialog for a detailed description of the fields in this dialog.


Creation of Forms step by step:


Windows

Main Characteristics of Window

In Zim applications, window objects are visually identical to standard windows in Microsoft Windows;

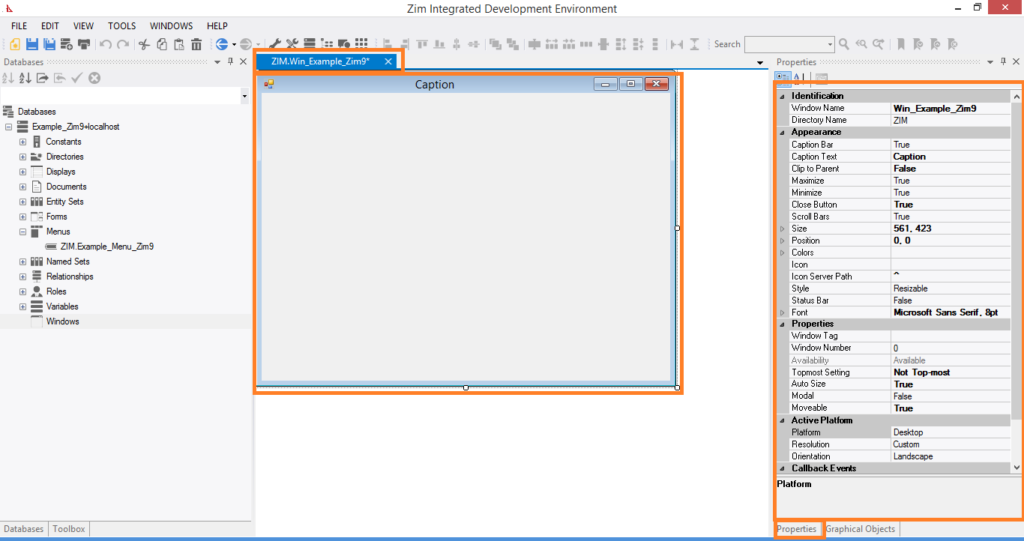
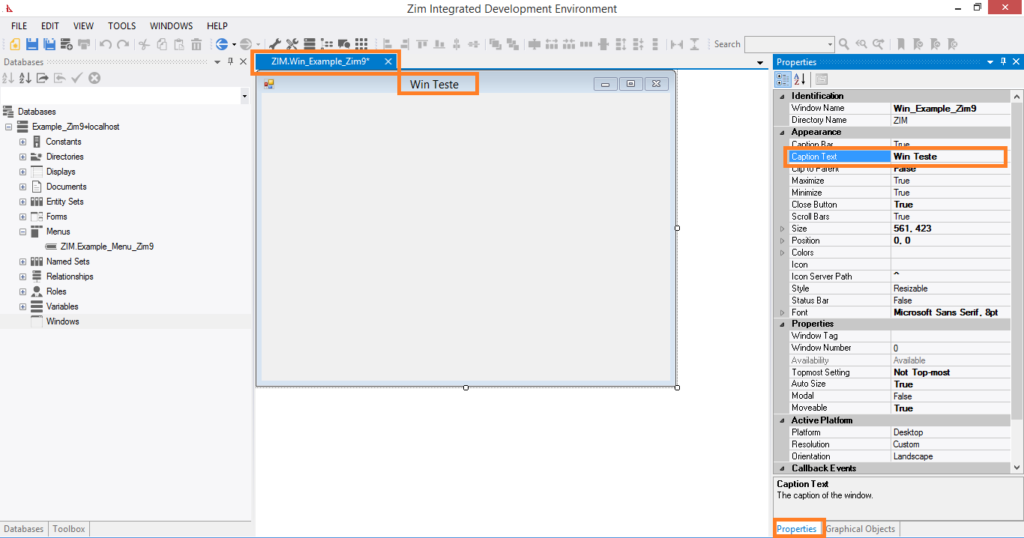
The visual and behavioral attributes of window objects are fully customizable by the Zim IDE via the Properties Tab;

The Zim language includes an extensive suite of commands for dynamically modifying both the visual and behavioral characteristics of window objects;

The Zim IDE supports the creation of associations among windows, menus, and either forms or displays so that they can be viewed and/or edited as a group;

A window object may be created directly by the developer or by the Zim IDE, in which case it is created automatically when the user creates a form or a display;

Window objects do not own user interface objects. Instead, they act as an interface between the operating system and forms, displays or menus.

Establishing a Window

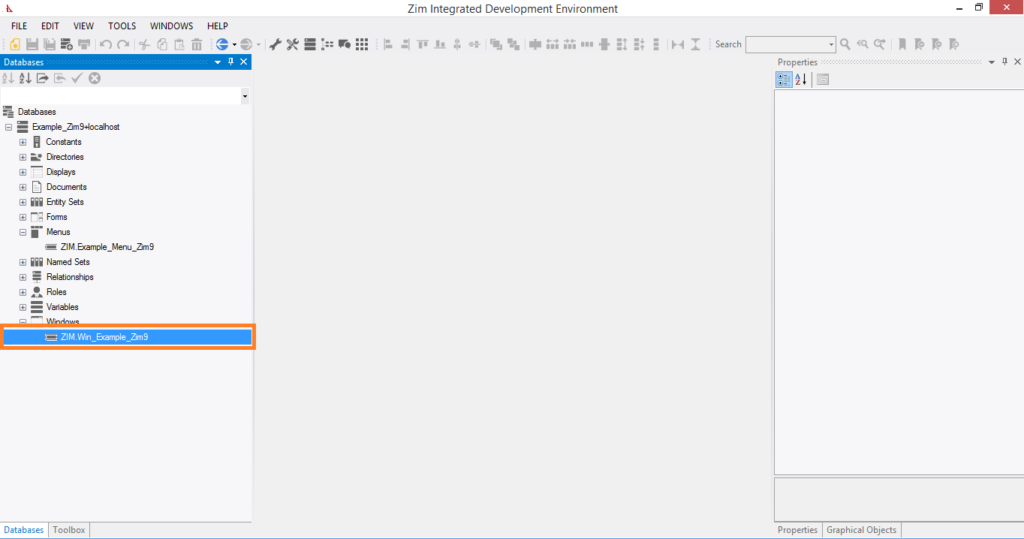
Call up the Zim IDE, select WINDOWS from the DataBases menu, and use the tools of the Zim IDE Development to define the desired Windows.

Creation of Window step by step:

Displays

Main Characteristics of Display Objects


✓ A display acts as a container for the form objects it owns.

✓ Display objects do not have any visual attributes other than implicit dimensions.

✓ The visual appearance of a display is the result of the visual attributes of the form fields owned by each of the forms           owned by the display;

✓ The dimensions of a display are considered to be the internal dimensions (i.e. the client area) of the window.

✓ The Property Tab is not available for display objects.

✓ The Zim  IDE supports the creation of associations among windows, menus and displays so that they can be                    viewed and/or edited as a group.

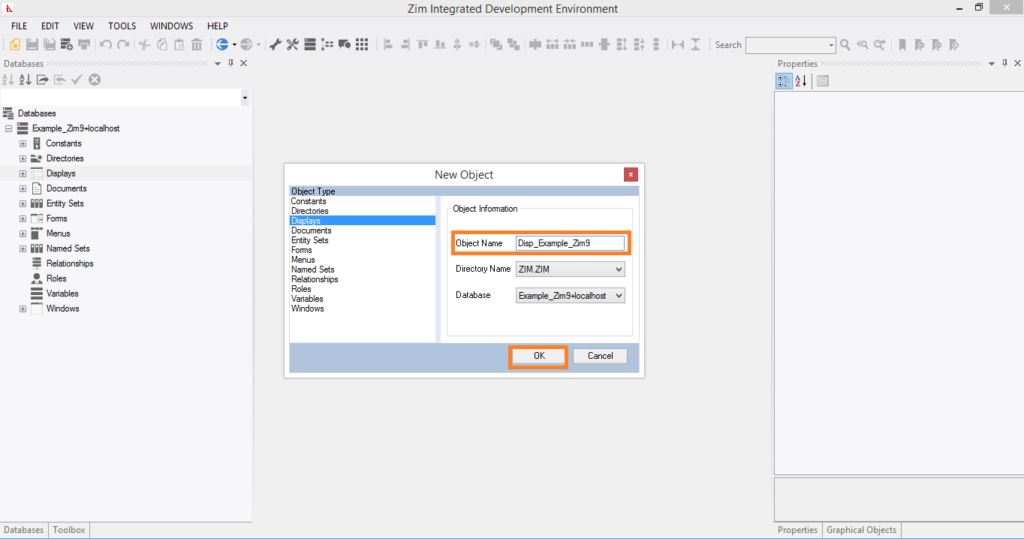
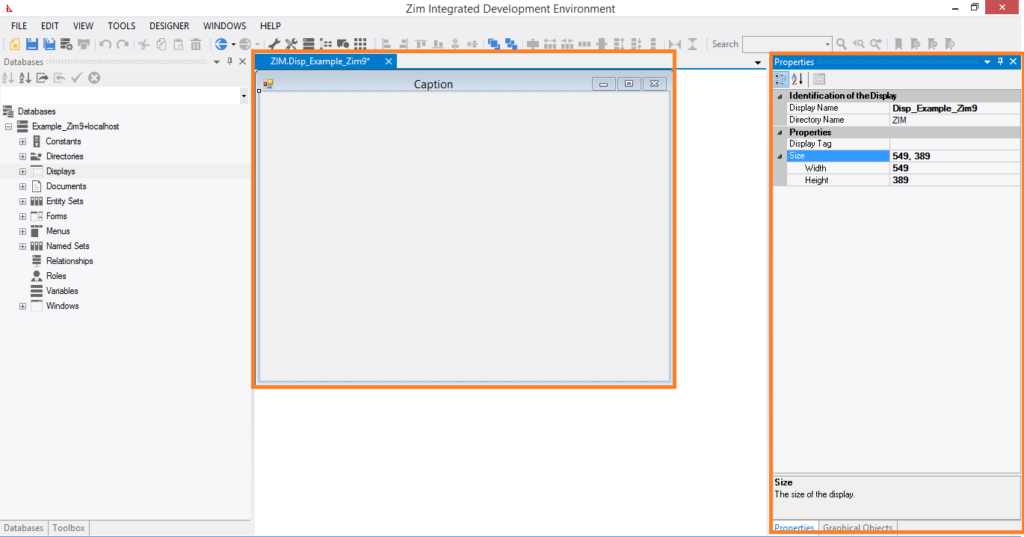
DISPLAY DEFINE If the painter was invoked by DISPLAY DEFINE, then every object type can be added. If the        display  does not already exist (i.e. there is no definition data for it in the Zim Data Dictionary), the paint window contains no forms. If the display does exist, the painter loads the forms owned by the display (and for each form, its form fields), into the paint window. Note that for a display to exist, it must own at least one form. In DISPLAY DEFINE, the display itself is not visible. The display is implicitly considered to be the client area of (i.e. the area within), the window. Hence resizing the window also resizes the display. If an association had previously been established between the display and a particular window, then that window is loaded as the paint window. If the association includes a reference to a particular menu, then that menu is also loaded and displayed within the paint window.

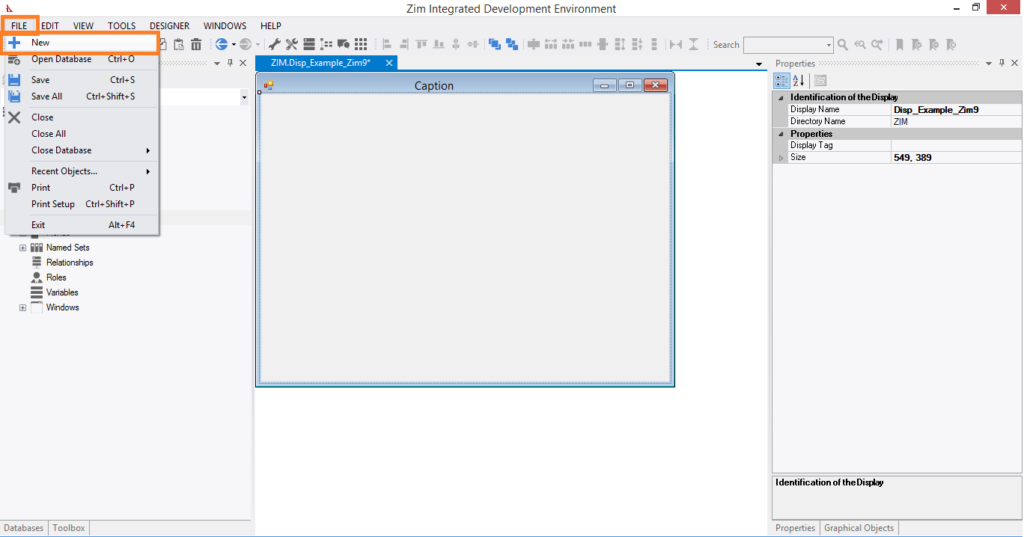
Creation of Display step by step:


NamedSets

Defines named sets. A Named Set is a programming object that identifies the components of a set that is used regularly in an application.  Named sets reduce the amount of code needed to run your application.  For example, if you are creating a database with an Customers Entity, you may want to have a set called “sMyCustomers”.  Find all Customers -> sMyCustomers.  So now that you have an Object called sMyCustomers, you can reference it anywhere if you program by calling the set.  If you add a new Customers record, you will have to add the new record to the set like this:

Find all Customers -> sMyCustomers
Add 1 Customers let Name = ... (include all of your customer fields) -> sAdded
Find sMyCustomers UNION sAdded -> sMyCustomers

This is a fast and simple way of updating the Named Set sMyCustomers without having to query the entire Entity again.

Establishing a Named Set

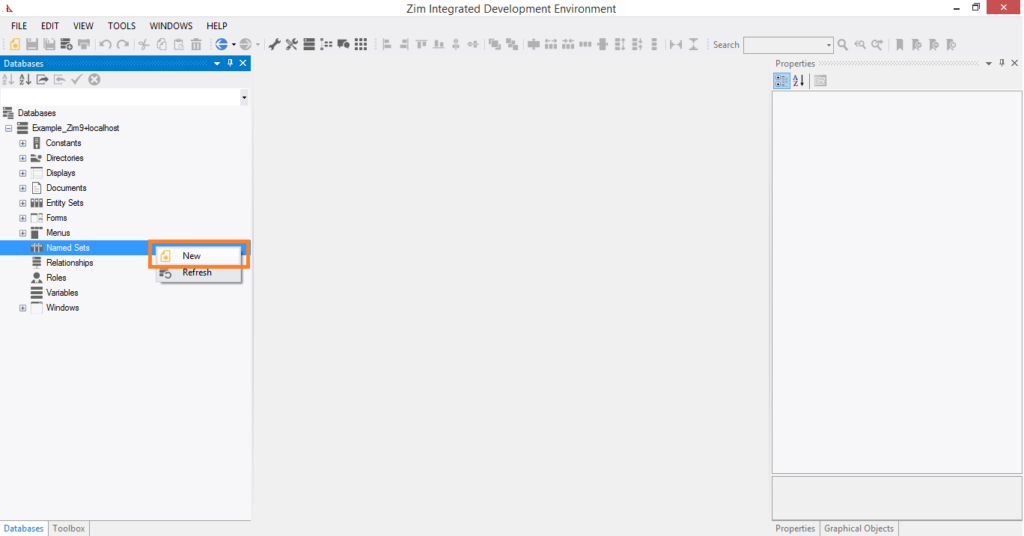
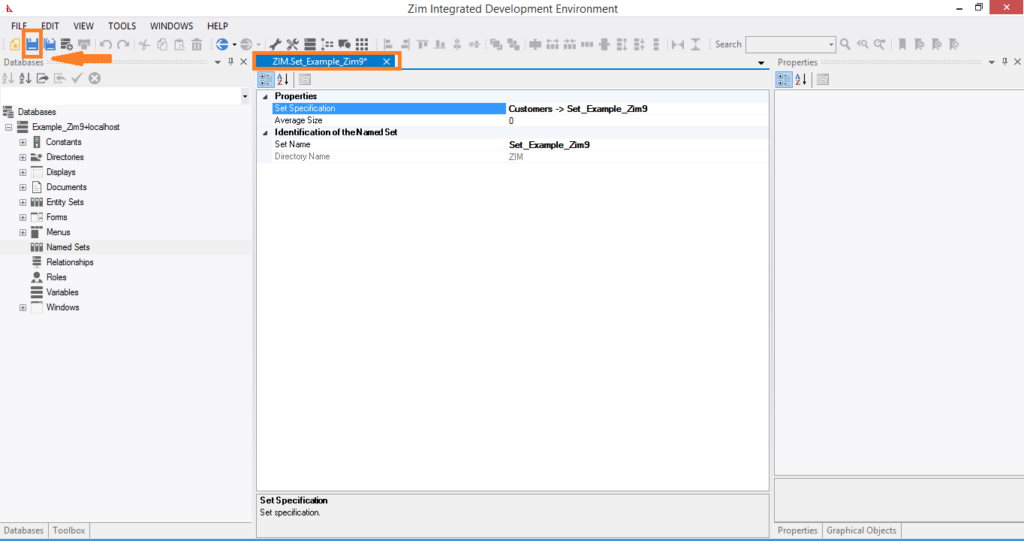
Call up the Zim IDE, select NAMED SETS from the DataBases menu, and use the tools of the Zim IDE Development to define the desired set.

Creation of Named Set step by step:

Roles

Defines alternative names for entity sets, relationships or for subsets of an object’s members.

A role is a programming object that provides an alternative name for a data object or for a subset of the members of a data object.

Establishing a Role

Access the Zim IDE, select ROLES from the DataBases menu and use the Zim IDE Development tools to define the desired role.

Creation of Roles step by step:
Directories


A directory is an application object. Application directories are used to organize the objects defined in the Object Dictionary for the application.

Establishing an Application Directory


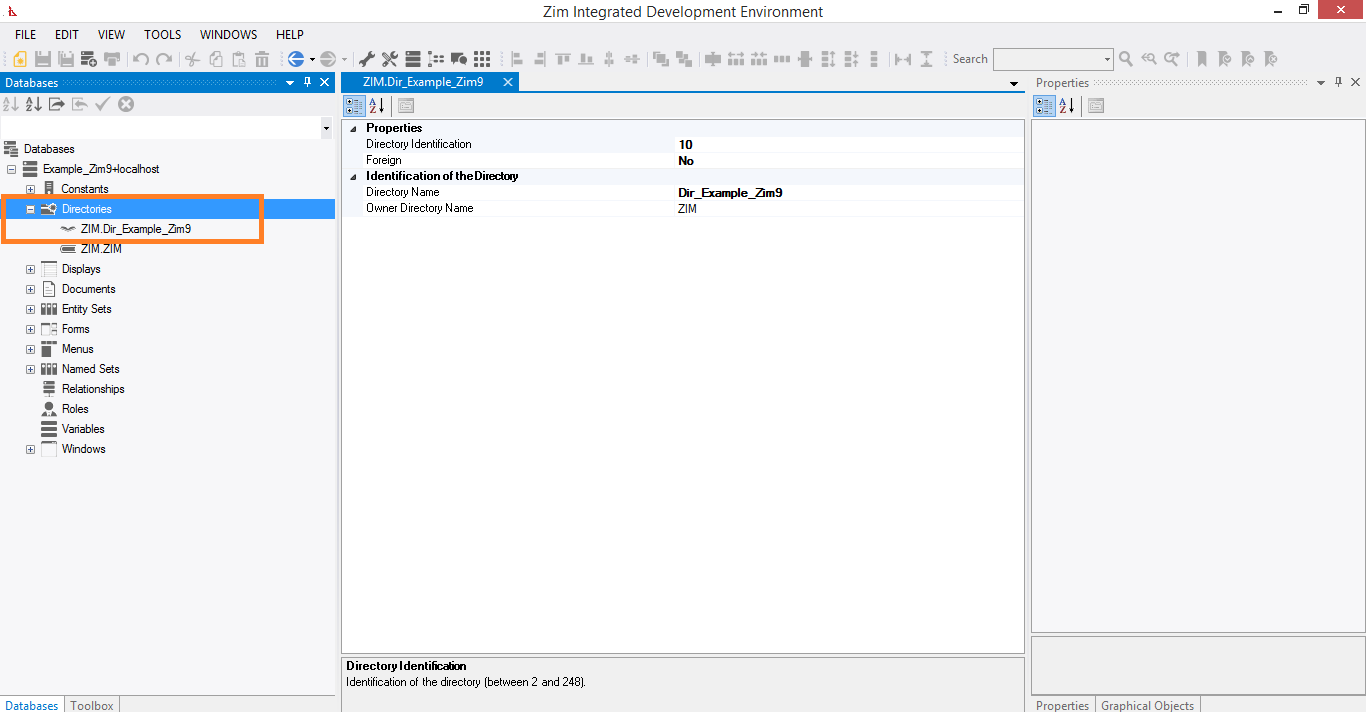
Call up the Zim IDE, select DIRECTORIES from the DataBases menu, and use the tools of the Zim IDE Development to define the desired directory.

Creation of Directory step by step:


Variables

Describes global variables. A variable is a programming object that provides a method of handling temporary data required for various purposes during application execution.

Zim provides a number of pre-defined system variables and sets or resets their values at various times.  For details, consult your Language Reference.

Establishing a Global Variable

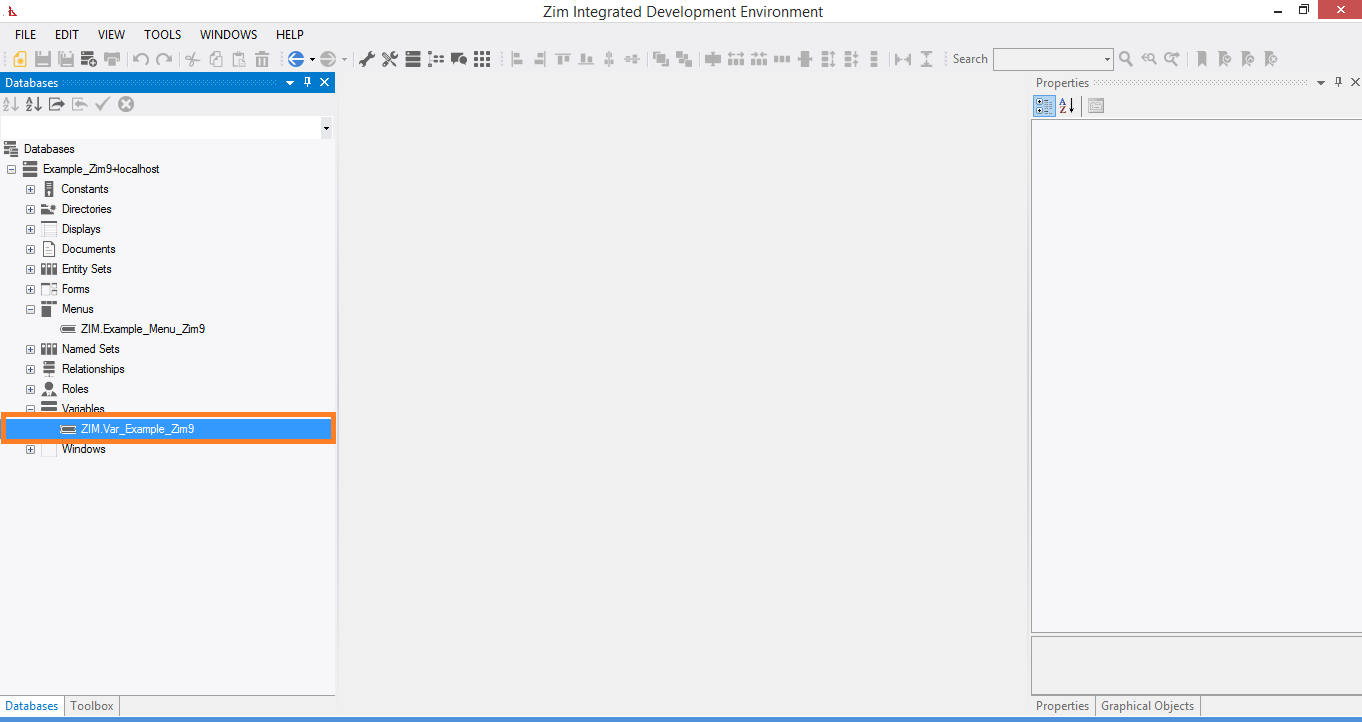
Call up the Zim IDE, select VARIABLES from the DataBases menu, and use the tools of the Zim IDE Development to define the desired Variables.

Creation of Variables step by step:
 

en_CAEnglish