Conditional Color Assignment Using $rgb()
Purpose
In Zim, you can use conditional logic to dynamically change the color of form objects based on runtime conditions such as user input, system status, or validation results. This is achieved using the if, elseif, else, and endif control structures in combination with the $rgb function.
Syntax
if condition
    action
elseif condition
    action
else
    action
endif
Example: Status-Based Field Coloring
if $status = "error"
    form set (fillcolor rgb $rgb(255, 0, 0)) MyForm.MyFormField
elseif $status = "warning"
    form set (fillcolor rgb $rgb(255, 165, 0)) MyForm.MyFormField
else
    form set (fillcolor rgb $rgb(0, 255, 0)) MyForm.MyFormField
endif
Explanation
- If the status is
"error", the field is colored red. - If the status is
"warning", the field is colored orange. - For all other statuses, the field is colored green.
Use Cases
- Form validation feedback (e.g., highlight invalid fields).
- User role–based UI customization (e.g., different colors for admin vs. guest).
- System alerts and notifications (e.g., color-coded warnings).
- Real-time sensor feedback (e.g., temperature thresholds triggering color changes).
Best Practices
- Keep RGB values consistent with your UI design system.
- Use descriptive variable names for conditions.
- Avoid deeply nested conditionals—break logic into reusable procedures if needed.
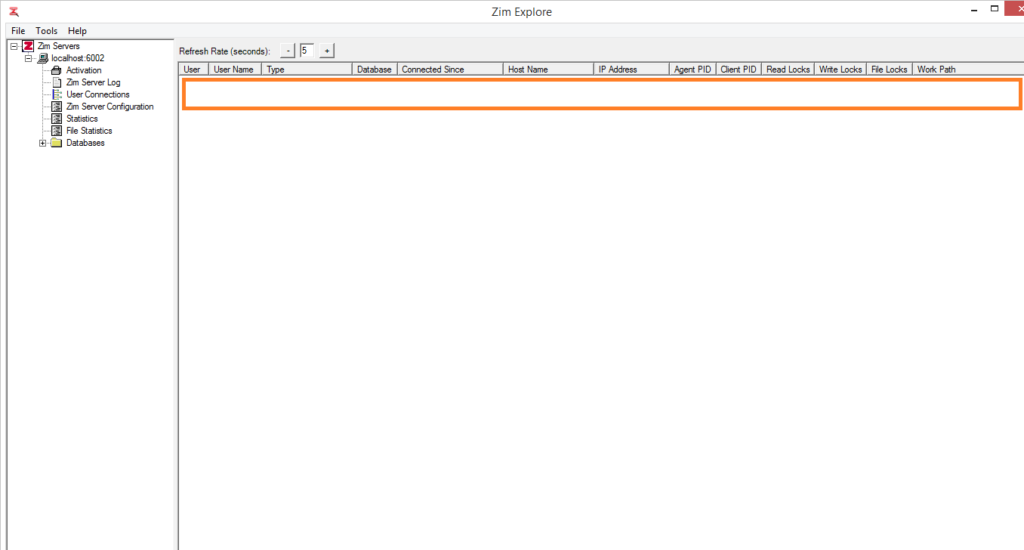
Viewing User Connections
The User Connection utility lists all users connected to the selected Zim Server and provides an interface for disconnecting users from the server.

The column headers in the User Connections grid are described in the table below:
Disconnecting Users
To disconnect a user, right click on the user number and then click on Yes in the pop-up dialog

The selected user connection will be terminated and the list of connected users will be updated

Activates ZIM products and provides information about the activated products in your system.
Syntax
ZIMACTIV [action] [serial number] [activation key] [company name]
Parameters
| action | An action to be taken in regards to an activation key. It can be one of-a Activates the ZIM product based on the information provided by the subsequent parameters.-c Checks the activation key.-i Lists information relevant to this activation key, such as validity, product, version, and so on.-l Lists information about all currently activated and licensed ZIM products.-m Indicates the platform to which this activation is applied.
Possible values are
1 – Windows
2 – SCO 6 and UnixWare
3 – AIX
4 – HP
5 – Solaris
6 – Linux-p Indicates the ZIM product to which this activation key applies.
Possible values are
1 – ZIM PDP
2 – ZIM ODBC Driver
3 – Server Access Modules (SAM)
4 – ZIM Web
5 – ZIM Backup Server |
| serial number | A five-digit number corresponding to the serial number of the ZIM product being activated. This number is provided by ZIM when you purchase the product. |
| activation key | String of 16 characters corresponding to the activation key of the ZIM product being activated (hyphens are optional). This key is provided by ZIM when you purchase the product. |
| company name | String of 8 to 50 characters corresponding to the name of the company that activates the ZIM product. This name is provided by ZIM when you purchase the product. |
Comments
The ZIMACTIV utility performs various operations in regards to the current activation key or in regards to the currently activated and licensed ZIM products. Specifically, the ‘-a’ option activates the ZIM product being installed, enabling the product to run.
The ZIMACTIV utility is invoked from the operating system prompt. To be run, ZIMACTIV requires at least the action parameter; if not present, you are prompted to enter it. You are prompted for any other required parameter as well.
The company name must be entered in quotation marks if blank spaces are part of the name. Lower and upper case, as well spaces, are ignored in this parameter; the company name cannot exceed of 50 characters.
The ZIMACTIV utility has a graphical version named ZIMACTIW that runs only on Windows. The ZIMACTIV utility runs on both Windows and UNIX.
Example
zimactiv –a 12345 ABCD-ABCD-ABCD-ABCD ”My Company Name”
The Zim Database Language Customizer utility displays and enables editing the contents of the zimlang.zim customization file for the selected Zim database.

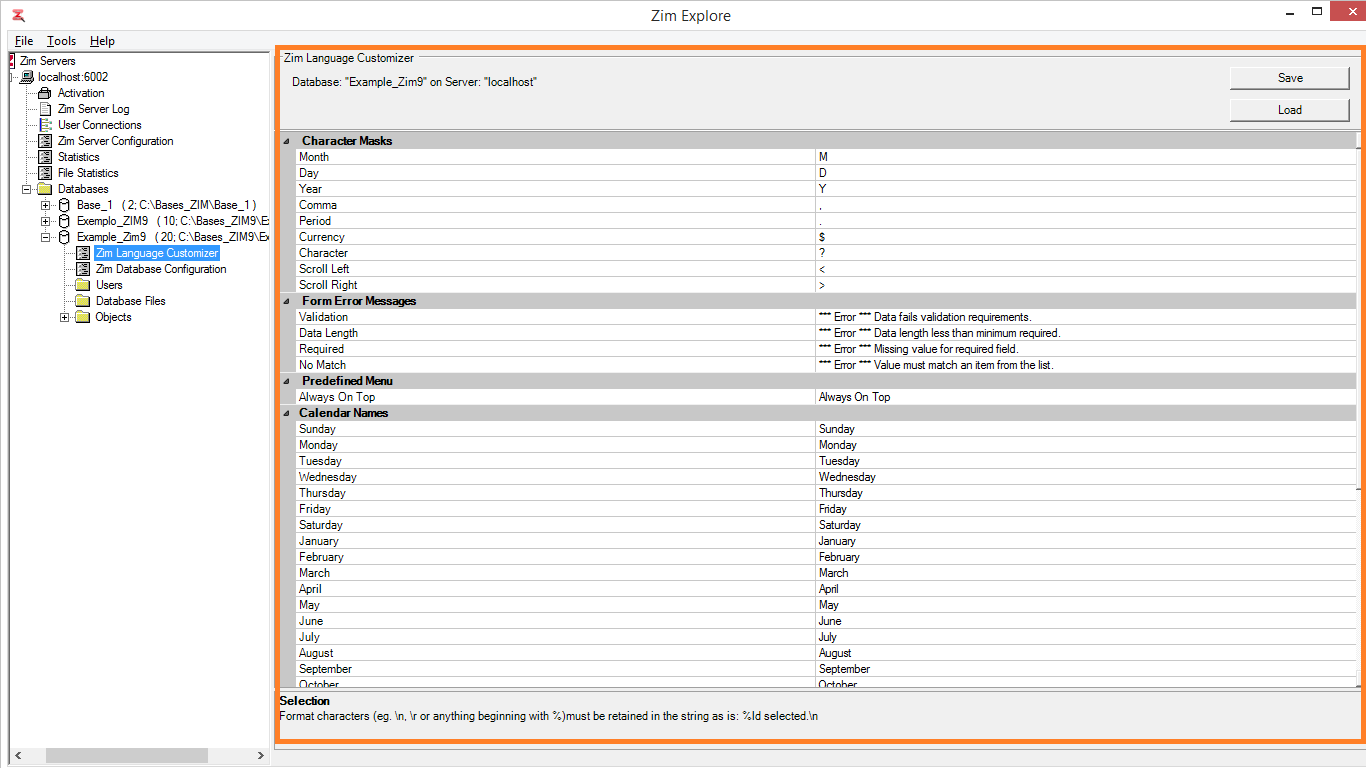
Click on the cell in the Current Value column along the row corresponding to the language customization item you wish to change

Type in the new value for the language customization item. The updated value will appear in bold. Click on Save to store the new language customization file
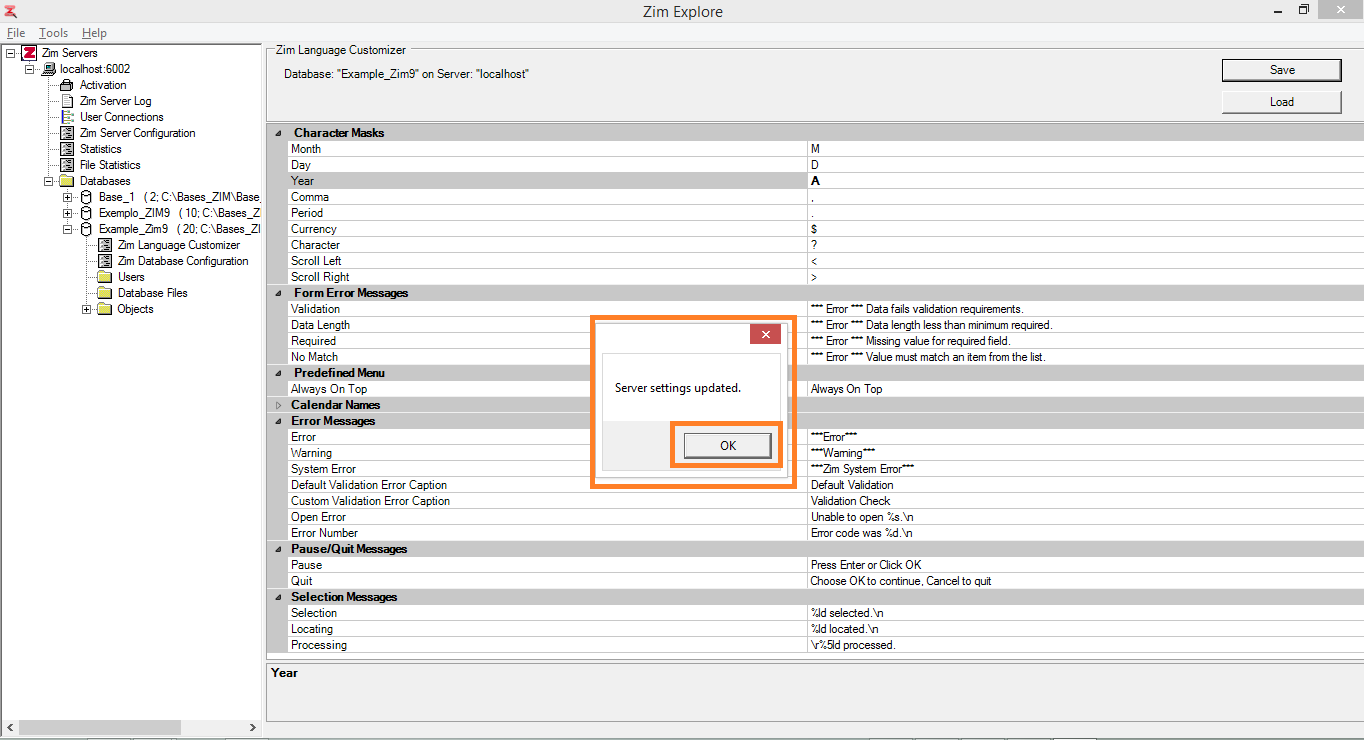
The Zim language customization changes for the selected database have been accepted and will take effect as soon as Zim Server restarts.
Activated Products
The Activation utility displays all currently activated Zim products installed on the same machine as the selected Zim Server.
Each row in the Activated Products grid corresponds to a single Zim product:


The column headers in the Activated Product grid are described in the table below:
Activating a New Product
New Zim products can be activated by clicking on Activate a New Product and providing the correct information in the dialog:
Note: You will always receive, via e-mail, the required activation information (Serial Number, Activation Key and Registration Name) for any Zim product licensed to you..

Click on Activate to complete the procedure.
Viewing User Connections
The User Connection utility lists all users connected to the selected Zim Server and provides an interface for disconnecting users from the server.
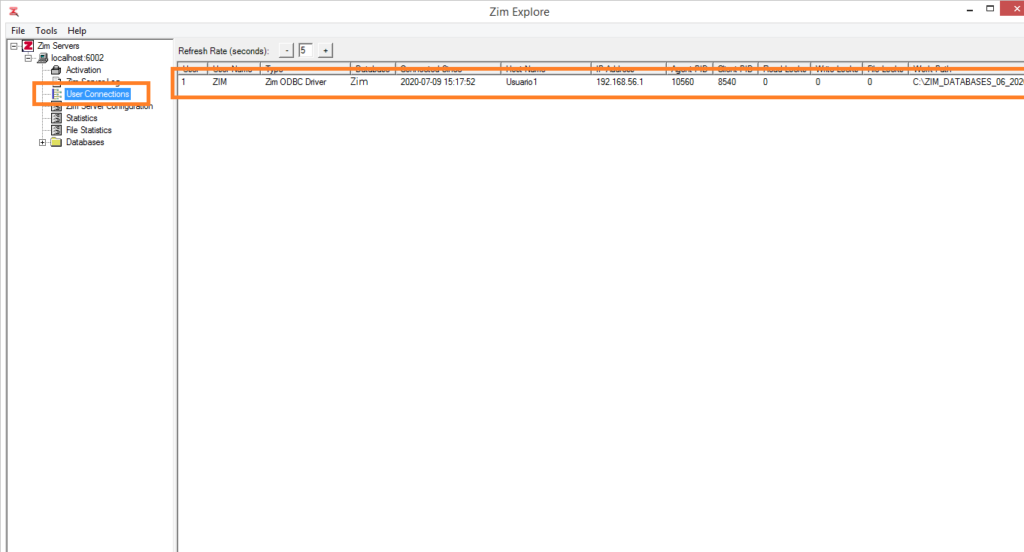
The column headers in the User Connections grid are described in the table below:
Disconnecting Users
To disconnect a user, right-click on the user number and then click on Yes in the pop-up dialog

The selected user connection will be terminated and the list of connected users will be updated
The File Statistics utility displays statistics for all open files that belong to any of the databases managed by the selected Zim Server.

Each Zim file is displayed in a single row in the File Statistics grid, whose column headers are described in the table below:
Note: You can sort the grid by clicking on its corresponding header tab. The first click sorts the table in ascending order and the second in descending order.
Adding a Zim Server
Add a Zim Server to the network tree by right-clicking on the Zim Servers node and then clicking on Add Server…

Alternatively, a Zim Server node can also be added to the network tree by selecting Tools and then clicking on Add Server…

Next, enter the Zim Server‘s IP address in the field provided (default: localhost), the port number (default: 6002) and press OK

A new node containing the Zim Server‘s IP address will appear in the network tree. If Zim Server is running on the same machine as Zim Explore, the new node will be labeled localhost

Connecting to a Zim Server
To connect to the newly added Zim Server, right-click on the server node and click on Login
To complete the login procedure, enter the user name (default: ZIM), the password (default: “”) and click on OK

Once the connection to the server has been established, a + sign will appear beside the server node

The server node can be expanded by clicking on the + sign or by double-clicking on the server node itself

Removing a Zim Server
To remove a Zim Server node from the network tree, right-click on the server node and click on Remove

Zim Server Statistics
The Statistics utility displays relevant information pertaining to the configuration and state of the selected Zim Server.

The column headers in the Zim Server Statistics grid are described in the table below:
.
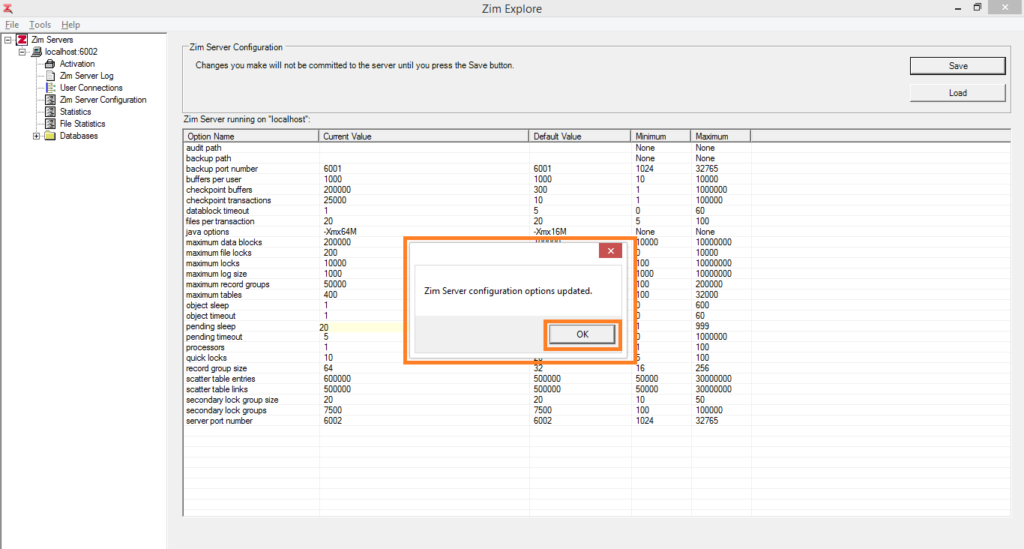
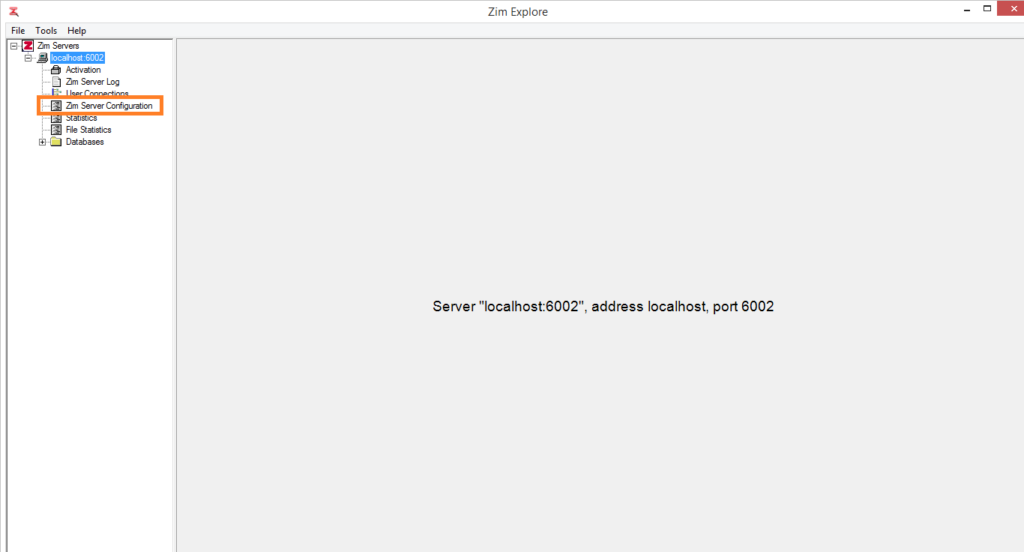
Browsing the Zim Server Configuration
The Zim Server Configuration utility displays and enables editing the contents of the zimconfig.srv configuration file for the selected Zim Server.
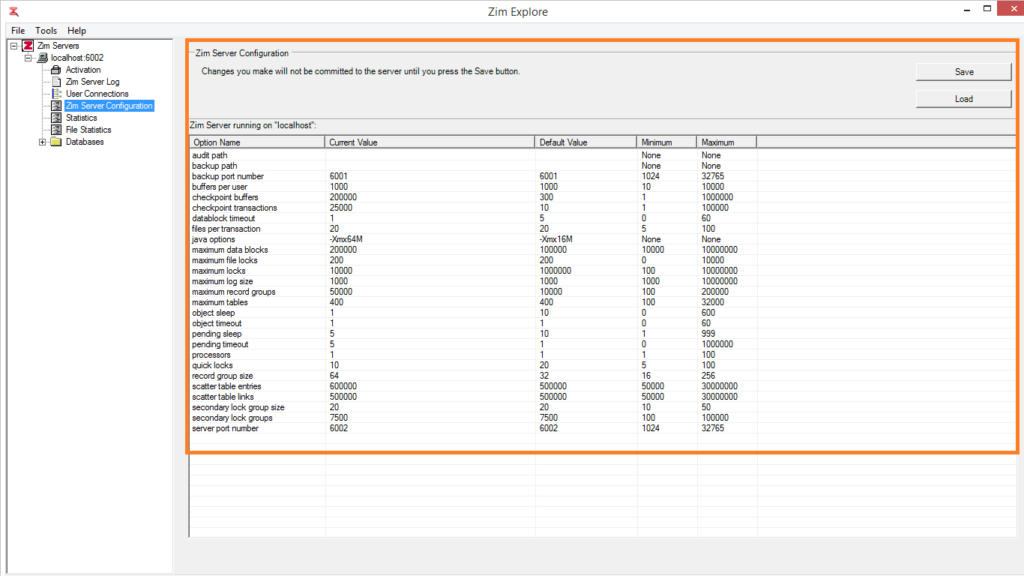
The column headers in the Zim Server Configuration grid are described in the table below:
| Column | Description |
|---|
| Option Name | The Zim Server configuration option |
| Current Value | The value assigned in the configuration file |
| Default Value | The default value for this option if no other value is assigned |
| Minimum | The minimum allowed value for this option |
| Maximum | The maximum allowed value for this option |
All the available Zim Server configuration options are listed in the table below. Click on any option to view more detailed information.
Editing the Zim Server Configuration
To change the value of a configuration option, click on the cell in the Current Value column along the row corresponding to the selected configuration option
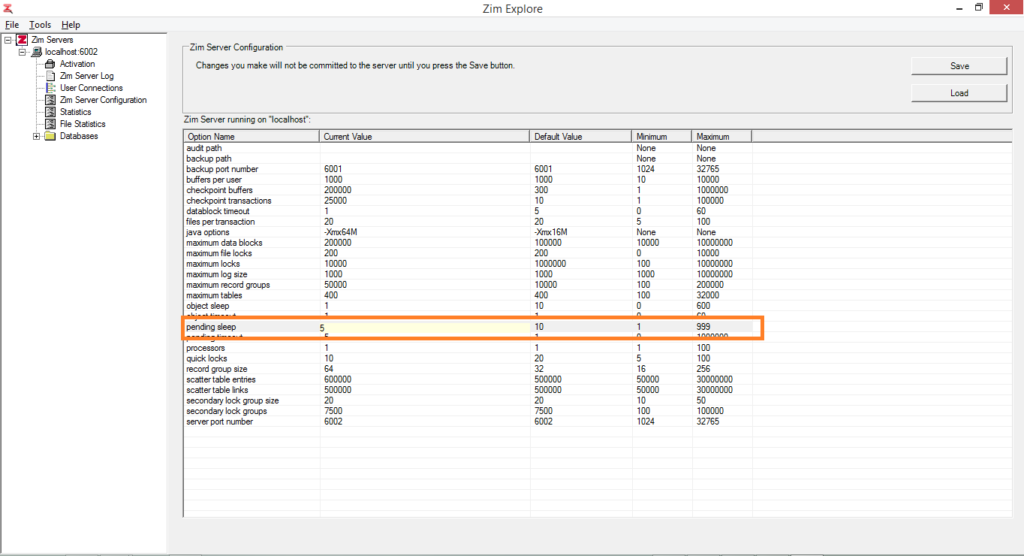
Type in or select the new value for the configuration option and click on Save to store the new configuration file

The Zim Server configuration changes have been accepted and will take effect as soon as Zim Server restarts. Click OK to dismiss the confirmation message